[wpseo_breadcrumb]
How to increase your WordPress website speed Significantly with the help of 4 Plugins
Although there are several factors on which the loading speed of any website depends. We shall discuss regarding the four plugins which are essential for boost up the performance of any WordPress website.
First, we shall analyze our website for its speed. There are many free tools are available over the internet through which you can check the speed of your website.
Some of the popular sites are:
- https://gtmetrix.com/
- https://www.dotcom-tools.com/website-speed-test.aspx
- https://tools.pingdom.com/
- https://developers.google.com/speed/pagespeed/insights
Above are some of the links where you can check loading speed of your website. We shall be demonstrating the website speed using GtMetrix before and after using the plugins.
Test Results before activating plugins
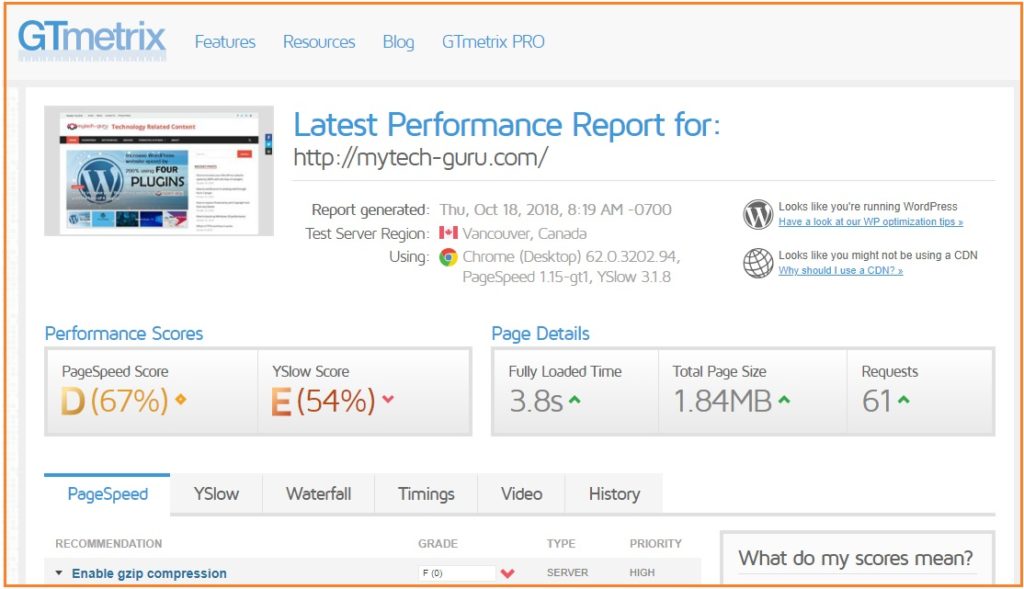
So, following are the test results of GTmetrix. These results have been obtained before activating the plugins. Here we can see that Page Speed Score is only 67% which is medium. The Yslow score is 54% which is quite low and average.
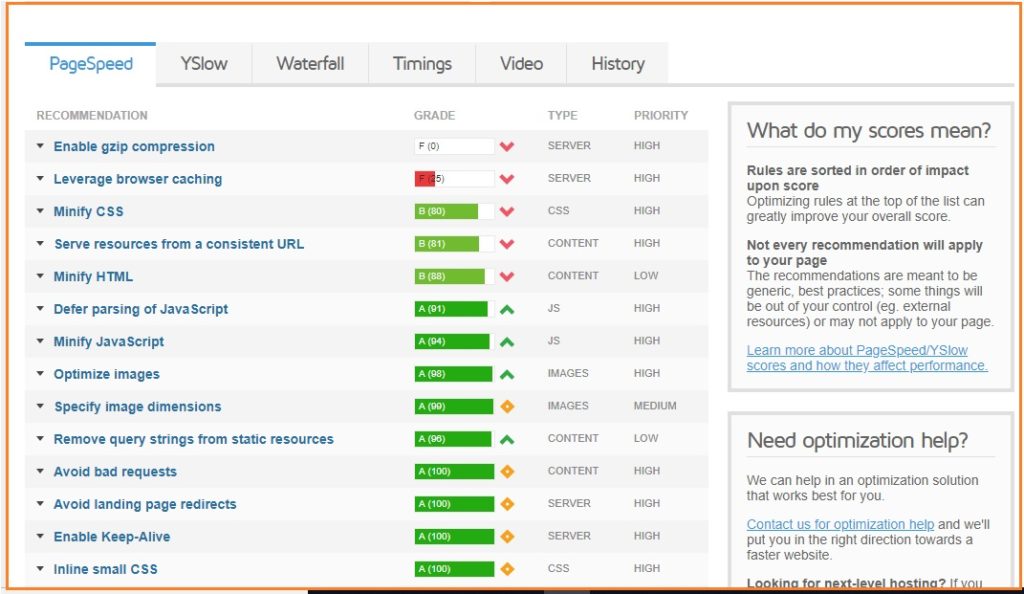
Details of PageSpeed is indicated in the following screenshot.
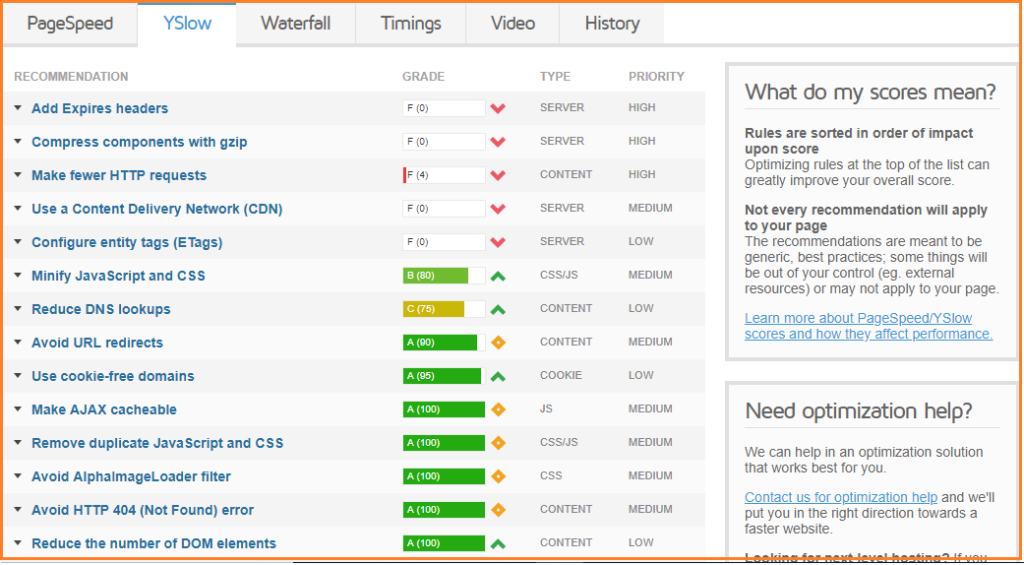
Details of YSlow is mentioned in the following screenshot.
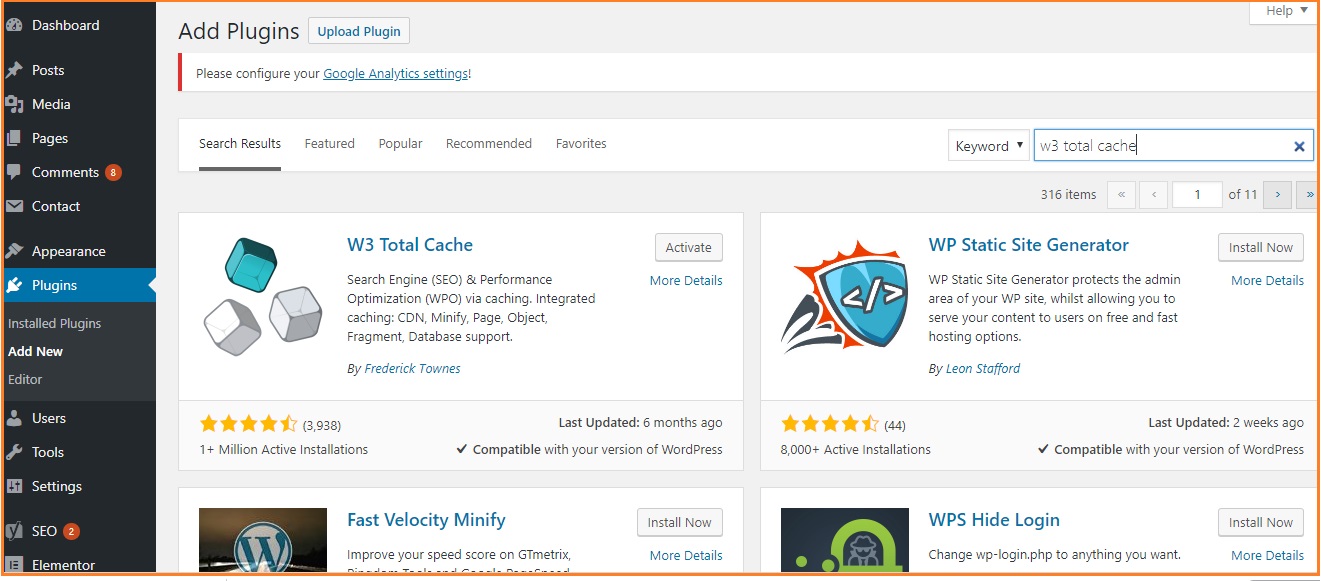
Now We will discuss the four plugins and their roles in detail. So the first plugin is W3 Total Cache. We shall install this plugin and configure it.
W3 Total Cache improves the SEO and user experience of your site by increasing the performance of the website & decreasing download times using its inbuilt feature like content delivery network (CDN) integration.
Now in order to install W3 Total cache, firstly, login to WordPress admin and open dashboard. Go to Plugins -> Add New find the W3 total cache and install it. Activate the plugin after installing it.
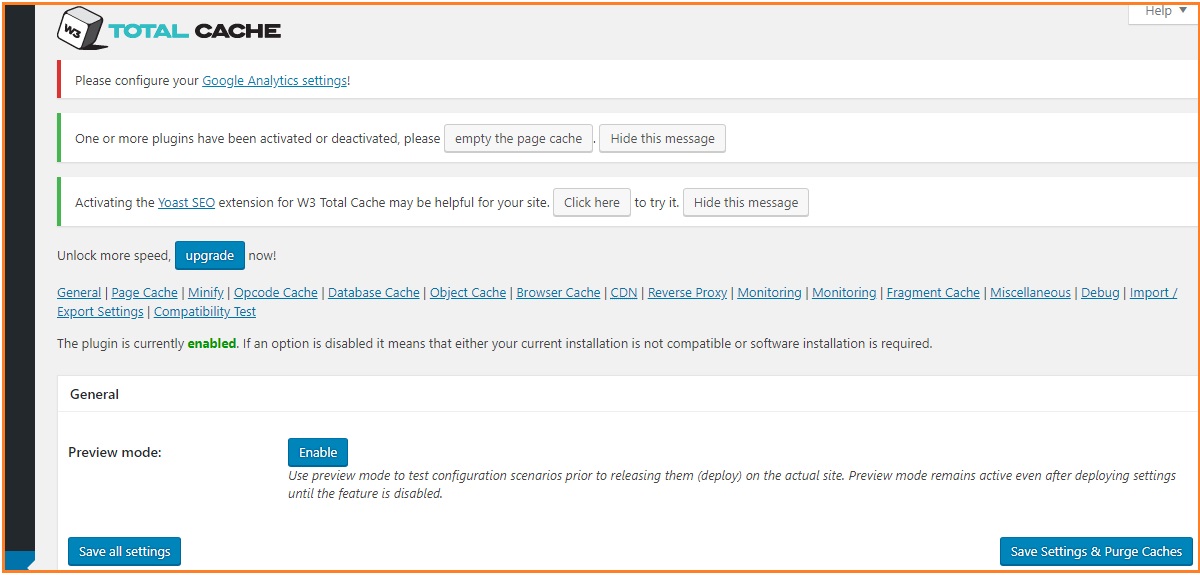
So, the plugin is activated as shown in the following screenshot.
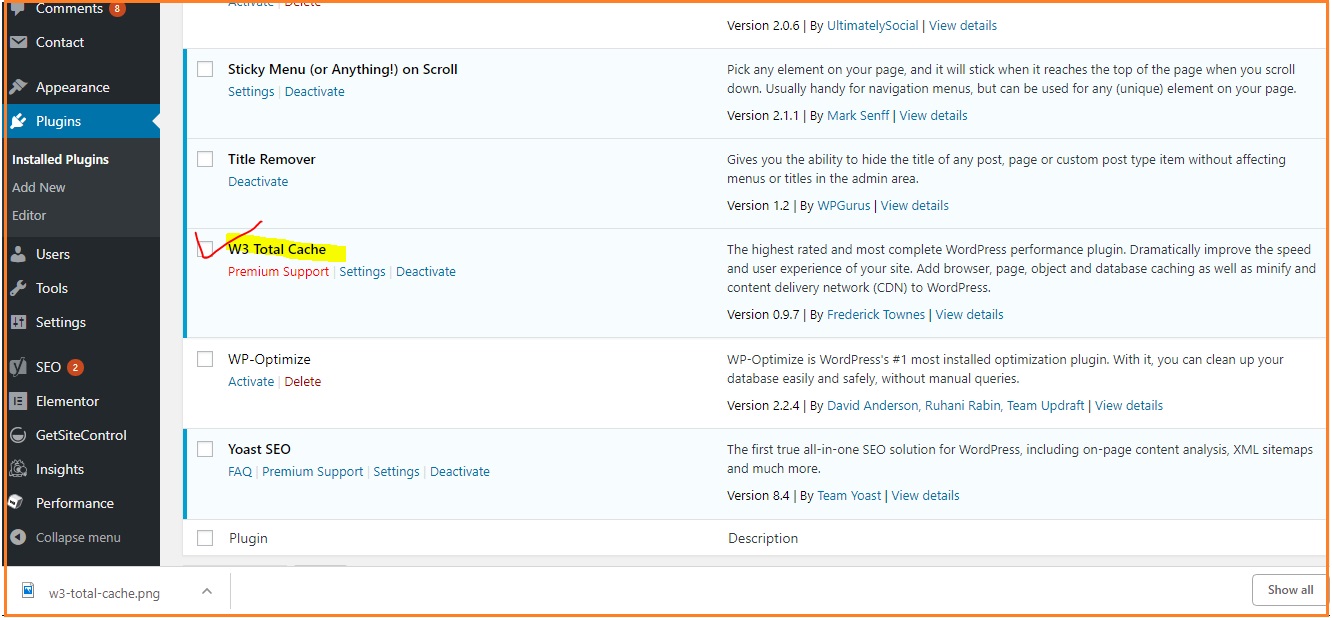 Now we will configure it. for this Go to Settings.
The following Screen will pop up.
First of all, enable Page Cache option as shown below. Save the settings.
Secondly, enable the Database Cache & Save settings.
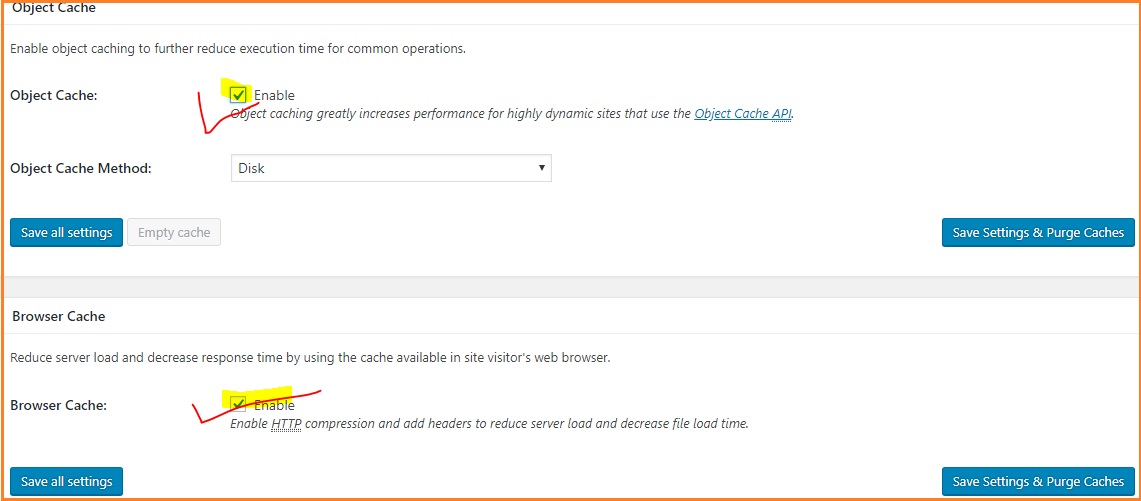
Next, Enable Object Cache and Browser Cache & save changes.
So, these are the main settings to be done for W3 Total Cache.
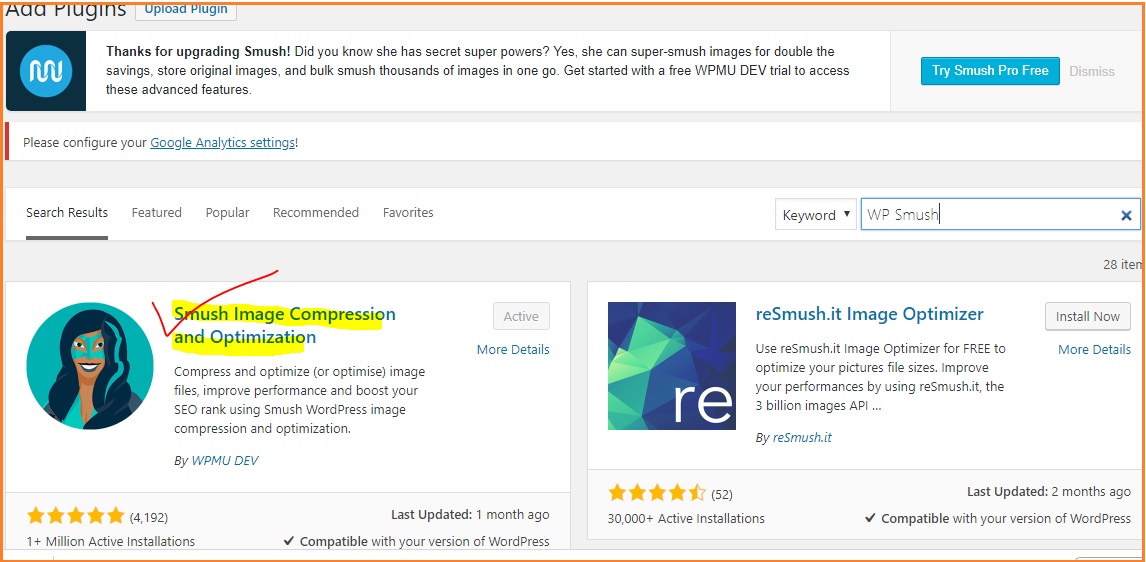
Now, We will focus on the second plugin which is WP Smush. Install it through the Dashboard plugins. As Add New->Search WP Smush and activate it.
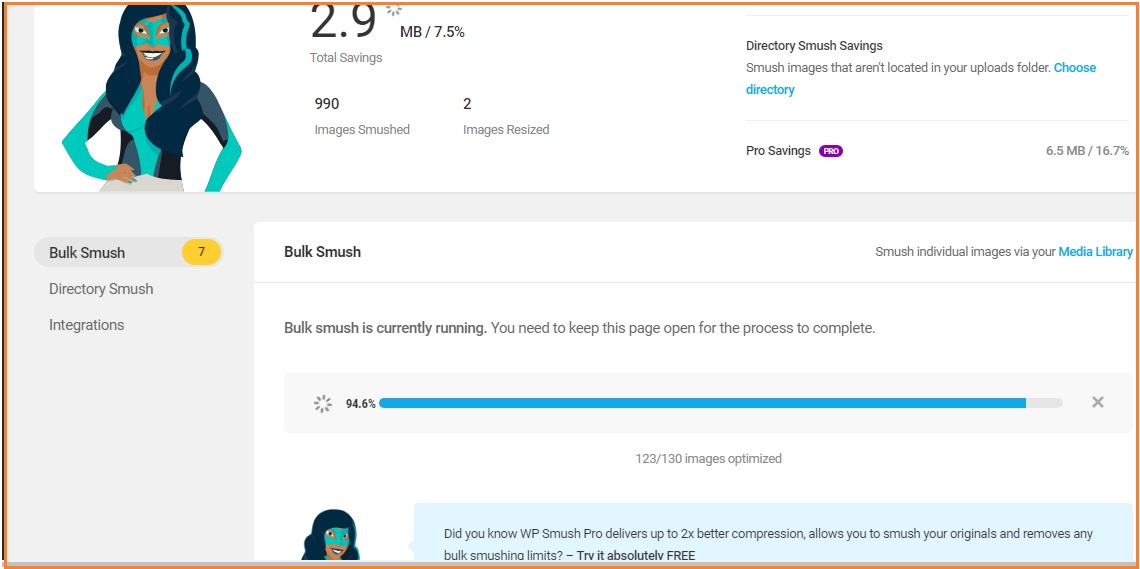
Now Settings of WP Smush. Click on Bulk Smush and let it complete the process up to 100%.
Activate Automatic Smush on upload option as shown in the following screenshot.
So these are the only settings to be done for WP Smush Plugin.
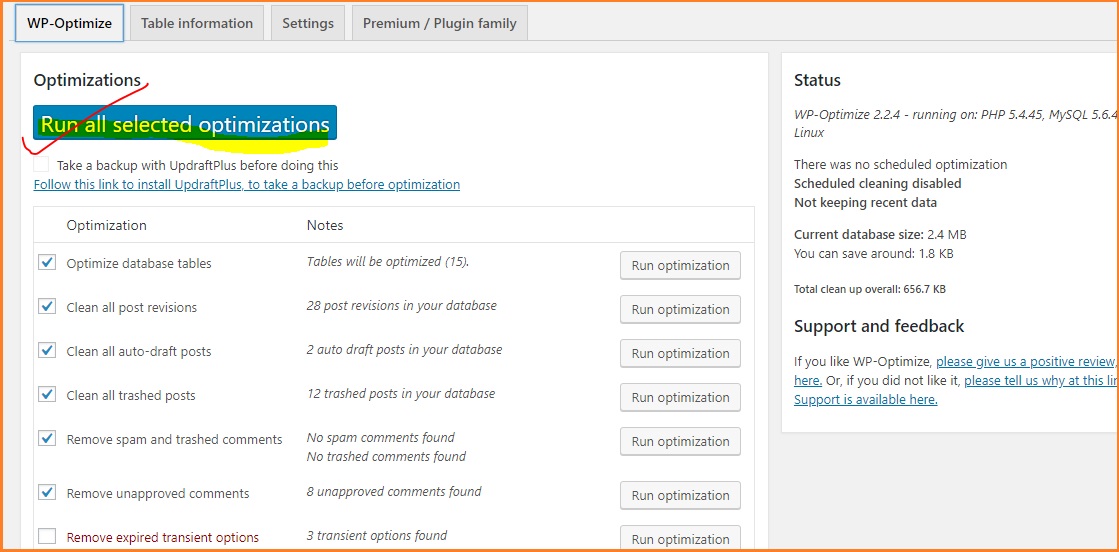
Now, We will focus on the third plugin which us WP-Optimize. Install it through the Dashboard plugins. As Add New->Search WP-Optimize and activate it.
Run All selected optimization as shown below in the screenshot. Keep on running this option once in a week.
Now, We will focus on the fourth plugin which is Regenerate Thumbnail. Install it through the Dashboard plugins. As Add New->Search Regenerate Thumbnail and activate it.
Run Regenerate thumbnail option as shown in the following screenshot.
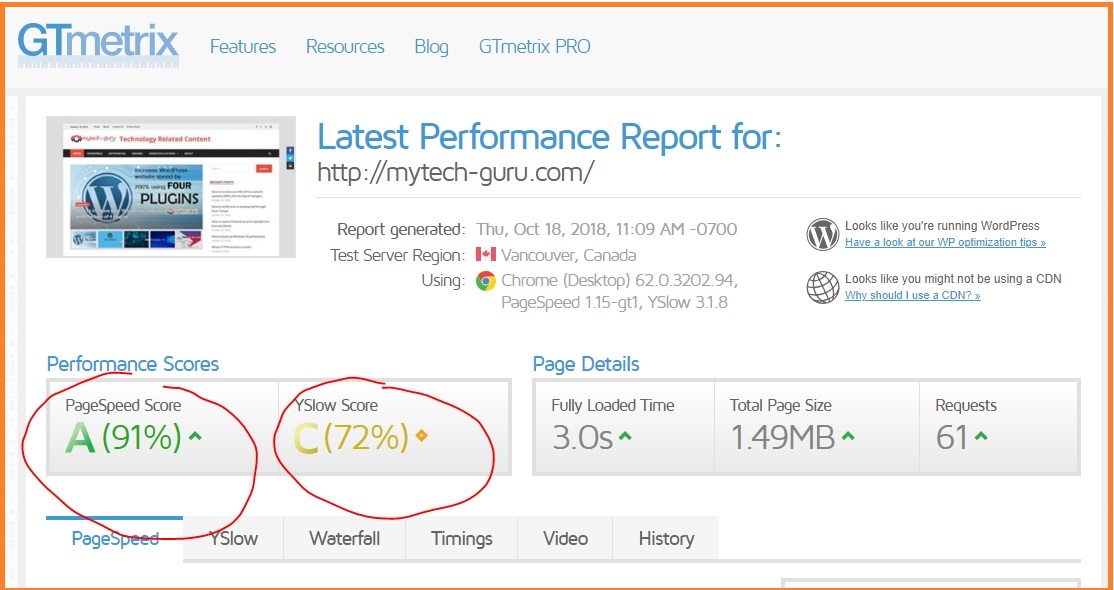
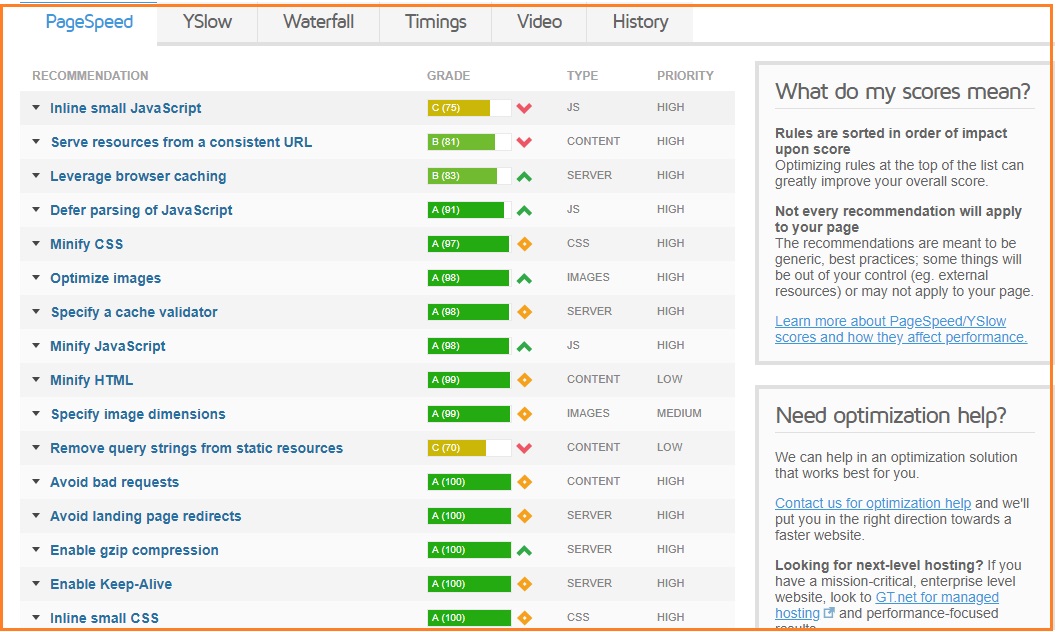
All four plugins are installed and configured. Now we will again test the website speed in GTmetrix and see how much improvement is there. From the following Screenshots, it is evident that there is a drastic improvement in the speed & performance of the website.
Therefore We can conclude that there is drastic improvement in the speed and performance of the website after installation and configuration of above mentioned four plugins.
Also Read:
How to set up Breadcrumbs in WordPress
Six Best WordPress Plugins for Caching – Live Comparison Test and Results
How to install XAMPP on a Windows Computer
How to fix iThemes Security Lockouts
How to install and set up Yoast SEO plugin in WordPress

